Removing Ink and Residue from Heat Press
Contents
- 1 Removing Ink and Residue from Heat Press
- 2 Removing Ink and Residue from Heat Press
- 3 3. Tools and Materials Needed
- 4 4. Safety Precautions
- 5 5. Step-by-Step Cleaning Process
- 6 6. Tips for Avoiding Residue Buildup
- 7 7. Removing Ink and Residue from Heat Press Frequently Asked Questions (FAQs)
- 8 8. Conclusion
Removing Ink and Residue from Heat Press
A Complete Guide
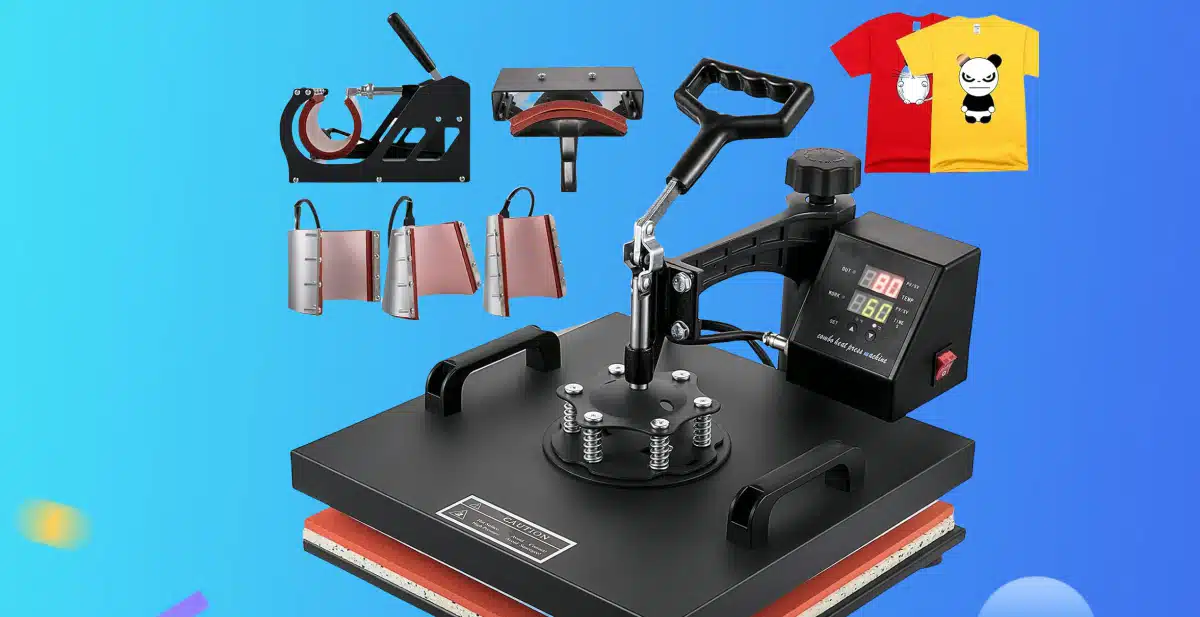
Keeping your heat press clean is essential for maintaining its performance and the quality of your prints. Over time, ink, adhesive, and other residues can accumulate on the platen and other parts of the machine, potentially leading to blemished transfers or even damage to the press. Regular maintenance ensures your machine operates smoothly, produces clear prints, and lasts longer. Here’s a step-by-step guide on how to effectively remove ink and residue from your heat press.
Removing Ink and Residue from Heat Press
Removing Ink and Residue from Heat Press
Removing Ink and Residue from Heat Press
1. Introduction
Over time, heat presses accumulate residues from inks, adhesives, and other substances used during the printing process. These residues, if left untreated, can transfer onto new projects, potentially causing unwanted smudges or imperfections. To keep your heat press in optimal condition, it’s crucial to regularly clean the platen and surrounding areas.
2. Why Regular Cleaning is Important
Regular cleaning is essential for several reasons:
•Print Quality: Residue on the platen can lead to blurry or uneven transfers.
•Machine Longevity: Proper maintenance prolongs the life of your machine.
•Health and Safety: Built-up residues may emit fumes when heated, which can be hazardous.
3. Tools and Materials Needed
Before starting, gather the following supplies:
•Heat press cleaner (specific for removing inks and adhesives)
•Soft, lint-free cloths or microfiber towels
•Heat-resistant gloves
•Non-abrasive sponge
•Isopropyl alcohol or rubbing alcohol (if applicable)
•Wooden or plastic scraper (avoid metal to prevent scratches)
•Cotton swabs for smaller areas
•Protective apron (optional)
4. Safety Precautions
•Turn Off the Machine: Always unplug and let your machine cool down before cleaning.
•Use Gloves: Wear heat-resistant gloves to protect your hands.
•Ventilate the Area: If using cleaning chemicals, ensure proper ventilation to avoid inhaling fumes.
•Read Product Labels: Use only recommended cleaners for heat presses, as some solvents can damage the surface.
5. Step-by-Step Cleaning Process
Cleaning your heat press requires attention to both the platen and the surrounding areas. Follow these steps to ensure a thorough clean.
5.1 Cleaning the Upper Platen
The upper platen often bears the most residue, so it’s crucial to clean it well.
1.Turn Off and Cool: Turn off the heat press and let the upper platen cool to a warm—not hot—temperature.
2.Apply Cleaner: Apply a small amount of heat press cleaner to a soft cloth.
3.Wipe the Platen: Use circular motions to gently remove ink and residue. Avoid pressing too hard to prevent damaging the surface.
4.Use a Non-abrasive Sponge for Stubborn Spots: For tougher stains, use a non-abrasive sponge or a soft cloth dampened with a little isopropyl alcohol.
5.Dry the Surface: Wipe away any remaining cleaner with a clean, dry cloth.
5.2 Cleaning the Lower Platen
The lower platen may not accumulate as much residue, but it still needs regular attention.
1.Remove Protective Pad: If your lower platen has a protective pad, remove it and clean it separately with warm water and mild soap.
2.Wipe Down the Platen: Use a cloth with cleaner to wipe the lower platen’s surface.
3.Allow to Dry: Let the platen dry fully before reapplying any protective pad or cover.
5.3 Cleaning the Surrounding Areas
It’s also important to keep the external parts of your machine clean.
1.Wipe Controls and Handles: Use a damp cloth to wipe down the control panel, handles, and other accessible areas.
2.Avoid Excessive Moisture: Do not allow water or cleaning fluids to seep into electrical components.
6. Tips for Avoiding Residue Buildup
Preventive care can reduce the need for deep cleaning:
•Use Teflon Sheets: Place a Teflon sheet over the platen to prevent ink and adhesive from transferring directly onto it.
•Check Temperature and Pressure Settings: Incorrect settings can cause ink and adhesive to ooze or transfer to unwanted areas.
•Regularly Clean After Each Use: A quick wipe-down after each pressing session can prevent residue buildup.
7. Removing Ink and Residue from Heat Press Frequently Asked Questions (FAQs)
•Q: Can I use household cleaners on my heat press?
•A: It’s best to use specialized heat press cleaners, as household cleaners may damage the platen’s surface.
•Q: How often should I clean my heat press?
•A: Light cleaning should be done after each use, with more thorough cleaning monthly, depending on usage frequency.
•Q: Is it safe to scrape off stubborn residue?
•A: Yes, but only use a plastic or wooden scraper to avoid scratching the platen.
8. Conclusion
Cleaning your heat press is an easy but essential maintenance step to ensure high-quality transfers and prolong your machine’s life. By following these steps, using the right tools, and adopting preventive habits, you can keep your heat press in peak condition for years to come. A clean heat press not only saves you time but also helps deliver the best results for your projects.
As a sublimation ceramic mug manufacturer and wholesale, we supply a range of sublimation ceramic mugs in top quality.
Removing Ink and Residue from Heat Press
