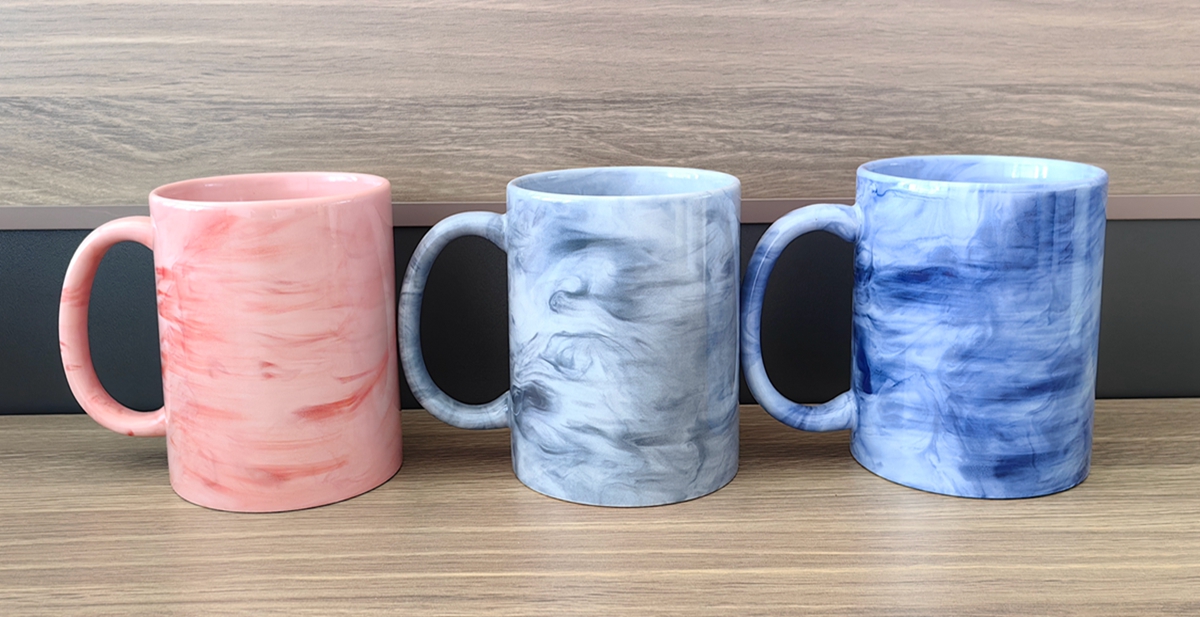
Marble sublimation ceramic mug
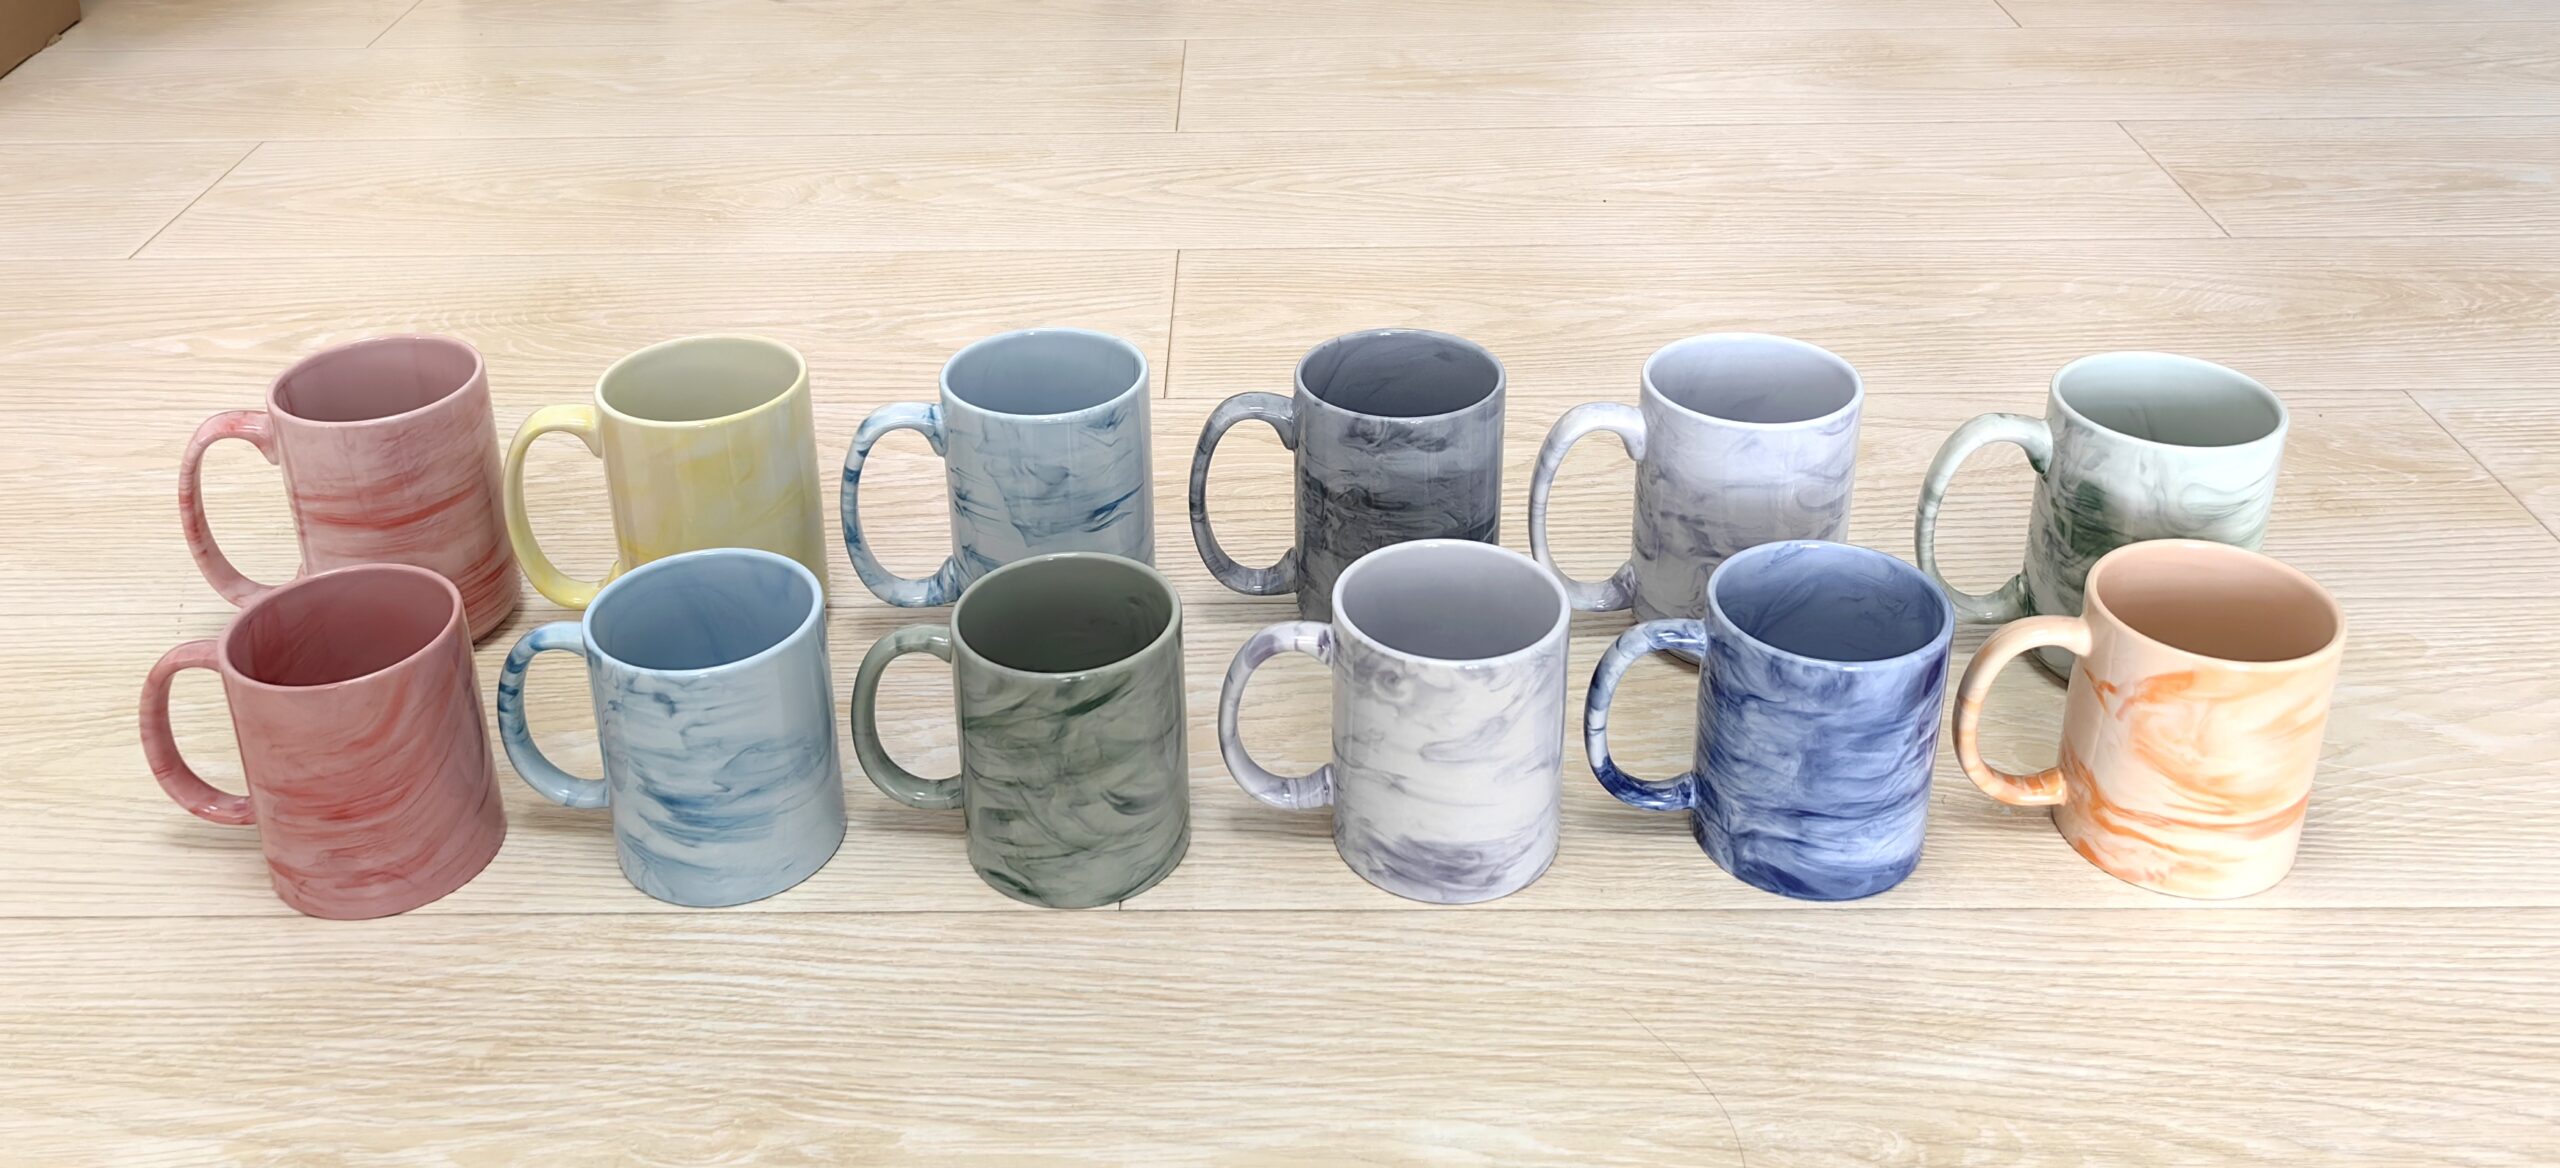
Marble sublimation ceramic mug are a type of drinkware made from ceramic material with a marble-like pattern on their surface. These mugs are specifically designed for sublimation printing, a process where dyes are transferred onto the surface of the mug using heat, creating vibrant, durable, and high-quality images or designs. The “marble” pattern refers to the natural, swirling designs often resembling real marble stone, available in various colors like gray, white, black, or even more vibrant hues.
_cuva
Marble sublimation ceramic mug key features include:
– **Ceramic material**: Sturdy and heat-resistant, making them ideal for both hot and cold beverages.
– **Sublimation-ready**: Coated with a special layer to accept sublimation printing, allowing for full-color, customized designs.
– **Marble finish**: The surface has a unique marble pattern, providing an elegant and stylish look.
– **Dishwasher and microwave-safe**: These mugs are often treated to be durable and safe for use in both appliances, though this depends on the specific coating.
They are popular for personalized gifts or promotional items due to their customizable nature and appealing aesthetic.
How to make a marble sublimation ceramic mug?
Marbling a mug with glazes involves layering and swirling different glaze colors on the ceramic surface to create a unique, marble-like pattern. Here’s how to do it:
You can watch the video on other website and check how to make a marble sublimation ceramic mug.
### Materials Needed:
– **Ceramic mug** (bisque-fired, unglazed)
– **Various glaze colors** (liquid form)
– **Brushes or squeeze bottles**
– **Water**
– **A container or shallow dish**
– **Stirring stick or toothpick**
### Steps:
1. **Prepare the Mug**: Make sure the mug is clean and free from dust. If necessary, wipe it down with a damp cloth.
2. **Prepare the Glazes**: Pour different colored glazes into separate small containers. You can dilute the glazes slightly with water if they are too thick, but they should still adhere well to the mug surface.
3. **Create the Marble Effect**:
– **Dip Method**: Fill a container with one base glaze (or water) and then drizzle or drip other glaze colors into the container. Lightly swirl the colors with a stick to create a marbled pattern.
– **Direct Application**: Alternatively, you can apply the base glaze to the mug first. Then, using a brush or squeeze bottle, add different colored glazes in random spots or streaks. Use a toothpick or brush to swirl the colors together gently.
4. **Apply the Glazes**: Dip the mug directly into the marbled glaze mixture (if using the dipping method) or apply the swirled glazes using a brush. Rotate the mug slowly to ensure even coverage.
5. **Smooth and Blend**: After applying the glazes, you can use a clean brush or sponge to smooth out any harsh lines or blend the colors further for a more natural marble effect.
6. **Dry and Fire**: Allow the glaze to dry completely. Once dry, fire the mug in a kiln according to the glaze manufacturer’s specifications.
7. **Optional Clear Glaze**: For extra shine and durability, you can apply a clear glaze over the marbled design before firing.
This technique can produce stunning, one-of-a-kind results with various color combinations and swirling patterns. Each piece will come out uniquely due to the fluid nature of glaze and firing.
7. **make the sublimation coating**After the finished mug is re-cleaned, then spray transparent coating and bake, check that there is no problem, and then pack.
Sources: Ceramic guides and pottery resources.
If you also like it, please contact us, we offer marble sublimation ceramic mug in various colors such as 11oz, 15oz, etc
